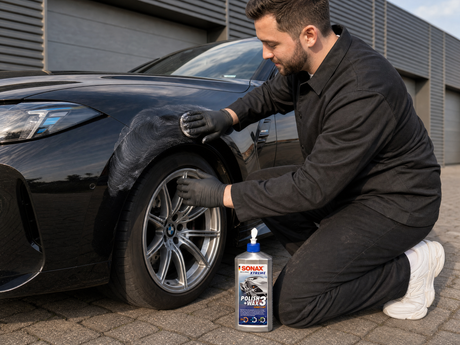




Anti-hologram polish: holograms only appear when you polish
We get this one almost every week: does the polish leave holograms on black paint? Behind the question sits an experience plenty of people know. Indoors the paint looks flawless, then you roll out into the sun and fine arcs start dancing across the bonnet. The car didn't get dirty in between. The last polishing pass wrote them in, with a hand movement that felt exactly right.
Holograms are directional micro-scratches that the machine itself cuts into the clear coat. Avoiding them comes down to three things: pad hardness, speed and how much pressure you put on in the final pass. The polish is only the third lever.
Holograms are directional micro-scratches under two micrometres
Holograms are unidirectional micro-scratches in the clear coat, typically less than one to two micrometres deep, that follow the path of the machine exactly.
The reason they seem to float above the paint comes down to wave optics. Parallel grooves turn the surface into a microscopic diffraction grating — a grid that no longer throws light back at one angle, but at many. What that means for you: every step you take around the car shows a different reflection peak, and it's that travelling highlight your eye reads as a three-dimensional pattern.
That's why holograms are all but invisible under an overcast sky and brutally obvious under a point light source. Diffuse light doesn't deliver enough directional intensity for an interference pattern. Sun or an LED spot deliver it instantly. Check only in daylight after polishing and you hand over a car that gives itself away in the next patch of sun.
How hard they show also depends on paint colour. Solid black counts as the toughest test, because black soaks up nearly the whole visible spectrum and the greyish scattered light off the scratch walls contrasts as hard as it can. On silver or white the high base brightness of the pigments masks the same defect almost completely. It's still physically there, and it turns up the moment a different colour rolls in.
It's no accident that the topic comes up right now. Searches for the term hit their yearly high in August, and the reason is mundane: high sun, low angles, long evenings. Exactly the light in which paint gives up its polishing history. Even if you worked clean in July, August is when you find out.
Holograms, swirls and haze only look alike
Three defects get mixed up constantly, and each one wants a different answer. You separate them by depth, direction and how they behave in light.
Holograms sit under one to two micrometres, run directional and in arcs, and show the 3D effect. Wash scratches, swirls in the scene, sit far deeper at two to four micrometres, run chaotic and spider-webbed, and leave a general grey veil. Micro-marring, also called DA haze, stays under half a micrometre, overlaps many times over and dulls diffusely, with no direction at all.
The practical upshot: swirls need real cut, so a cutting polish. Holograms and haze need the opposite, a pass that removes material instead of scratching it in. Reach for a coarse polish on holograms and you swap a fine problem for a rougher one, and you have to finish afterwards anyway. Two steps for a defect that needed one.
Where they come from separates the three as well. Swirls come out of the wash, when grit gets between the mitt and the paint. Micro-marring happens on the random orbital, when the pad is too hard or the throw too big for a soft paint. Holograms are almost always rotary buffer trails, often out of a saturated pad: spent clear coat and dried carrier oils harden into sharp-edged clumps that work like sandpaper.
So what comes first isn't a product decision, it's a diagnosis. One look in raking light at a degreased panel tells you whether you're correcting or only finishing. How to read the defect properly, we showed in detail in spotting swirls in your paint.

The pad sets the limit, not the polish
The most common wrong assumption in finishing: a fine polish on its own guarantees a fine result. The pad decides how fine the cut can get at all.
Wool and microfibre pads work through their fibre structure like thousands of little blades. That rules them out for the finish step, whatever polish sits on top. Even a hard foam pad still digs in with its stiff cell walls when the polish is already ultra-fine. For a hologram-free finish, what's left is soft, fine-pored foam pads with no cut of their own.
On the chemistry side crystalline aluminium oxide dominates. Two designs sit side by side: with diminishing abrasives, large agglomerates keep breaking down into smaller primary crystals under heat and pressure and end the cycle under one micrometre. With non-diminishing systems the grit size stays constant at roughly one to two micrometres. In practice: the first design you have to work all the way through, the second you can wipe off whenever you like.
Two dosing mistakes undo any good pad. Too little polish means it runs dry straight away and leaves heat marks. Too much creates an aquaplaning effect: the machine floats on a film of oil, the grit never engages, never breaks down, and it pulls fresh micro-scratches in when you wipe off with the towel. Between panels the pad wants blowing out or brushing off, otherwise the residue from panel three carries on working on panel four.
The Koch-Chemie Micro Cut "M2.02" Hochglanz Antihologramm Politur sits exactly in this finish class, which is what an anti-hologram polish is built for. The matching pad belongs with it: the Micro Cut Soft Foam Pad "Violett" (Soft) for delicate paints, the Micro Cut Hard Foam Pad "Violett" (Hard) for tougher ones. Detailers consistently describe the soft pad as ideal for the finish polish, backed by verified reviews at Trusted Shops.
The last cross-hatch pass runs with no pressure
The step that actually prevents holograms costs nothing and still gets left out most often: the pressure-free final pass, jeweling in the scene.
The sequence on the panel is tightly timed. You keep the section to 40 by 40 centimetres, 50 by 50 at most, because bigger sections warm up unevenly and the polish dries on in patches. After priming the pad with four to five pea-sized drops, three or four per section are enough, so around two to three millilitres. You work a cross-hatch with 50 percent overlap, horizontal and then vertical.
Speed follows the phase. On a rotary you spread at 600 to 800 rpm, work at 1000 to 1500 and come back down to 600 to 900 for the finish. On a random orbital the finish sits at roughly 3000 to 4500 OPM. From 1500 to 1800 rpm the carrier oils flash off before the grit has broken down. That dry running burns in the furrows you later call holograms.
On the last pass you take the pressure off completely, the machine glides on its own weight alone, and you move at two to three centimetres per second. Just as important: the clear coat stays hand-warm, 40 to 45 degrees at most. Above that it closes in on its glass transition between 50 and 80 degrees, turns tacky and won't wipe off cleanly any more.
That's why polishing is an indoor discipline. Ideal is 18 to 22 degrees room temperature and 40 to 60 percent humidity. Too dry lets the emulsion flash off too fast; above 70 percent, water-based polishes swell up and clump. In direct sun a dark roof passes 70 degrees and sits close to the glass transition before the first pass. A rainy day like today makes a better polishing day than a Sunday in high summer.

Our anti-hologram picks for random orbital and rotary
A hologram-free finish takes four things: the right machine, a soft pad, an anti-hologram polish and a degreaser to check with. None of them replaces another.
On the machine side the random orbital is the safe route. Its throw, the sideways travel of the backing plate, is 8 to 15 millimetres as standard and forces every grain onto constantly changing paths, so directional patterns never build in the first place. The FLEX "XFE 2 15 18-EC" 15mm Cordless Random Orbital Polisher with Free Spin sits at the top end of that corridor with 15 millimetres. If you want the choice between drive types settled properly, it's in random orbital or rotary.
For the polish itself, the Micro Cut "M2.02" Hochglanz Antihologramm Politur stays our first reach, because it's built for exactly this step and doesn't finish as a side effect of a one-step product. You pick the pad by paint hardness, not by habit, and the system behind that is in choosing pad hardness. More finish options sit in the Polish category, the pads in Polishing pads.
Before the whole car gets it, a test spot settles the combination. You tape off a patch of roughly 20 by 20 centimetres with residue-free Masking Tape and start with the finest option. Only when that patch stays hologram-free does the combination go onto the panel. The tape has a second use: polish one side through, pull the tape off, and the difference stands there as a dead-straight edge.
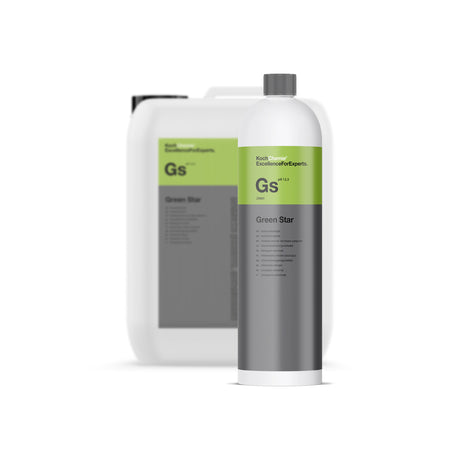
The fourth piece gets skipped most often and decides how honest the result is. Filling polishes, glazes, lay silicone oils, resins or kaolin into the grooves and even them out optically. A few washes with a surfactant shampoo and the fillers are out and the pattern is back. Koch-Chemie Panel Preparation Spray "Pps" Degreaser & Inspection Spray pulls the polishing oils off and shows what has really gone.
Soft paint wants a random orbital, hard clear coat takes rotary
The last call hangs on the paint, not on what the tool costs. Two families behave in opposite ways under the pad, and each one needs its own strategy. There is no standard combination that works across every manufacturer.
When the paint is soft, as on a lot of Japanese factory finishes, go random orbital with the soft pad and an oil-rich polish. Systems like that let you correct defects easily and pay back every bit of extra friction with fresh haze. Let the paint warm up and the polish glues on and barely wipes off. For the check wipe there, 15 percent IPA is plenty, more swells the matrix.
When the clear coat is hard, as on the highly cross-linked systems from German manufacturers, a cleanly guided rotary with a pressure-free final pass can finish brighter than the random orbital. The polymer matrix stands up to the pad while the grit works fully. The hard Violett pad suits that better. For the check wipe, 15 to 25 percent IPA is right, ideally one part to four or five parts distilled water. Neat, there's no lubricating film and you rub fresh scratches in.
You never wipe off under ceiling light. To find the marks you need a point source with high colour fidelity, in practice a colour rendering index above 96 and 250 to 2500 lux at half a metre. On dark paint, cold daylight around 6500 kelvin draws them most clearly; on silver and white you have to come down to 2500 to 4500 kelvin, otherwise the light washes over the pigments. Walk the viewing angle from flat through to square on.
And the honest limit: an anti-hologram polish only takes off 0.5 to 2 micrometres. It wipes out holograms and haze, and it leaves wash scratches and deep scratches where they are, which stays the job of a cutting polish. Work with this: clear coat averages a thin 35 to 50 micrometres, and over the life of the car about 25 percent of that counts as your budget, so roughly 10 to 12.5 micrometres. Finish as often as you like. Cutting, no.

Detailing1 insight: The one change that does the most in our consultations is dosing. Almost everyone lays down too much. On the violet finish pad, pinhead-sized dots are enough, not peas — a thin film is worked through faster, because the grit breaks down sooner. On one of our test cars in Nordhorn we ran double the amount, needed two passes longer and still had residual haze, because the machine floated up on the film of oil. To check, grab the manufacturer's degreaser instead of neat alcohol, it's easier on the pad.
No time for the whole post? Get it summarized: